Table of Contents
Note – Some of the updates highlighted in this article are currently under active development and will be rolled out in upcoming releases.
Have you ever been at a point where everything is technically ready? Your parametric models are detailed, customizable, and production-ready. But when it’s time to actually sell them, everything feels harder than it should be.
Let’s take a short walk in your shoes. You’re running a jewelry studio or a custom furniture workshop. You’ve poured hours into building beautiful, tweakable 3D models for your customers. But then comes the real chaos: managing price quotes by hand, tracking orders through endless email threads, struggling to calculate costs based on dimensions, and trying to remember which version of the design your customer even saw.
Your inventory might be buried in a separate spreadsheet. Model updates aren’t synced. And when a customer makes a change, you’re bouncing between your editor, a catalog doc, and a calculator just to get them a basic price. This isn’t just your story. It’s a shared frustration we’ve seen across studios, freelancers, and manufacturers worldwide. The problem isn’t the design software. The real struggle starts after the design. That’s where we stepped in.
We built the Business Dashboard to bridge this exact gap. It’s more than just a tool. It’s your backend command centre. Which is designed to help you upload models, link real materials, attach production services, manage quotes and orders, and run a complete digital workflow with confidence.If you’re building custom products, we believe you shouldn’t have to choose between creativity and clarity. With BeeGraphy’s Business Dashboard, you get both.
Let’s dive in and see how it works, who it’s for, and how it can help you scale smarter.
What Led Us to Build the Business Dashboard
When we spoke with designers, manufacturers, and studios using parametric design tools, one thing became very clear, there was a huge gap between what they were creating and how they were managing their business around it.
They had the creativity, the innovation, the designs but managing catalogs, updating models, calculating real-time prices, processing orders, handling materials, and coordinating quotes? That part was messy, disconnected, and time-consuming.
That’s why we built the BeeGraphy Business Dashboard.
We didn’t want to just simplify workflows. We wanted to completely reimagine what a backend should look like for businesses working with configurable products. Our goal was to give creators everything they need in one place: from model management to storefront integration and pricing automation, so they can focus more on their craft and less on spreadsheets and logistics.
This dashboard isn’t just a tool. It’s a launchpad for turning custom products into a scalable, sellable reality.
Who Thrives Using the Business Dashboard
The Business Dashboard isn’t just for hobbyists. It’s for professionals who turn custom designs into real, sellable products. If you work in parametric modeling, personalized production, or made-to-order manufacturing, this is your toolkit.
Here’s who benefits most:
- Jewelry and Furniture Designers
You’re using 3D tools to craft pieces with endless customization options. Our dashboard helps you control every version, price it correctly, and manage it all from one place. - CNC and Laser Manufacturers
You need precision and speed. This platform gives you exact material calculations, filtered services, and live pricing logic to make quoting and production seamless. - 3D Printing Studios
Dealing with volumetric materials, variable models, and customer-specific specs? We’ve got the tools to automate pricing and track it all. - Architecture and Product Design Firms
For studios offering parametric solutions at scale, we support multi-model management, version control, and integration with storefronts or quoting systems. - Educators and Researchers
Got parametric models from experimental or academic projects? You can monetize them in the BeeGraphy Marketplace and manage every sale right here.
No matter the industry, if your product is customizable, the Beegraphy Business Dashboard is your new control room.
Getting Started as a Manufacturer on BeeGraphy
Ready to take your designs from concept to commerce?
Becoming a manufacturer on BeeGraphy is your first step toward unlocking the Business Dashboard and it’s easier than you think. Whether you’re a solo creator or a growing team, you can activate your business space in just a couple of clicks.
You’ve got two easy ways to do it:
Option 1: Through Your Profile Menu
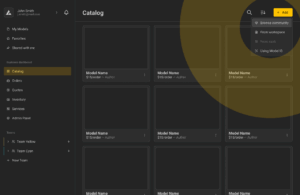
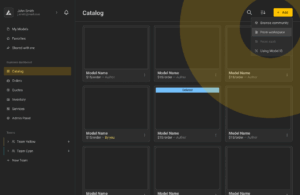
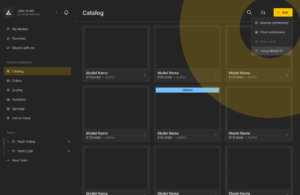
Let’s say you’re already in the Editor working on your latest model. Just head over to the top-left corner and click on your profile icon. You’ll see a dropdown (like in the image below) with an option that says “Create a Business.”
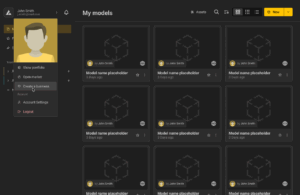
Access the “Create a Business” option from your profile menu to start setting up your BeeGraphy business account.
This flow allows you to initiate your business account setup directly from your profile, even if you missed or closed the promotional sidebar earlier. It’s a secondary but always-available access point to start building your storefront and configurator tools.
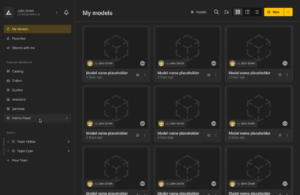
Option 2: Via the Sidebar Banner in “My Models”
If you’re inside your My Models section, you’ll notice a helpful banner on the lower left that says “Create a Business – Try BeeGraphy product configurator for free.” Clicking that will guide you straight into the business setup.
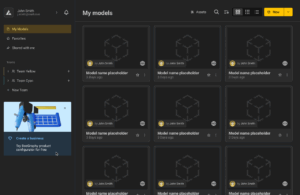
Use the “Create a Business” banner in the lower-left sidebar of the My Models page to easily access BeeGraphy’s business setup and start using the product configurator for free.
This is a great entry point for first-timers and anyone looking to try out the platform without needing to dig into menus. We built it this way so the opportunity to grow your business is always visible, never hidden behind complex steps.
Setting Up Your Business Account
We built the business account setup to be simple, intuitive, and adaptive—whether you’re a solo designer or managing a growing team.
Step 1: Switch to a Manufacturer Account
Start by navigating to your profile settings. As shown in the image below, you’ll find an option labeled “Switch to a manufacturer account” just below the payment link button. This is your gateway into the Business Dashboard.
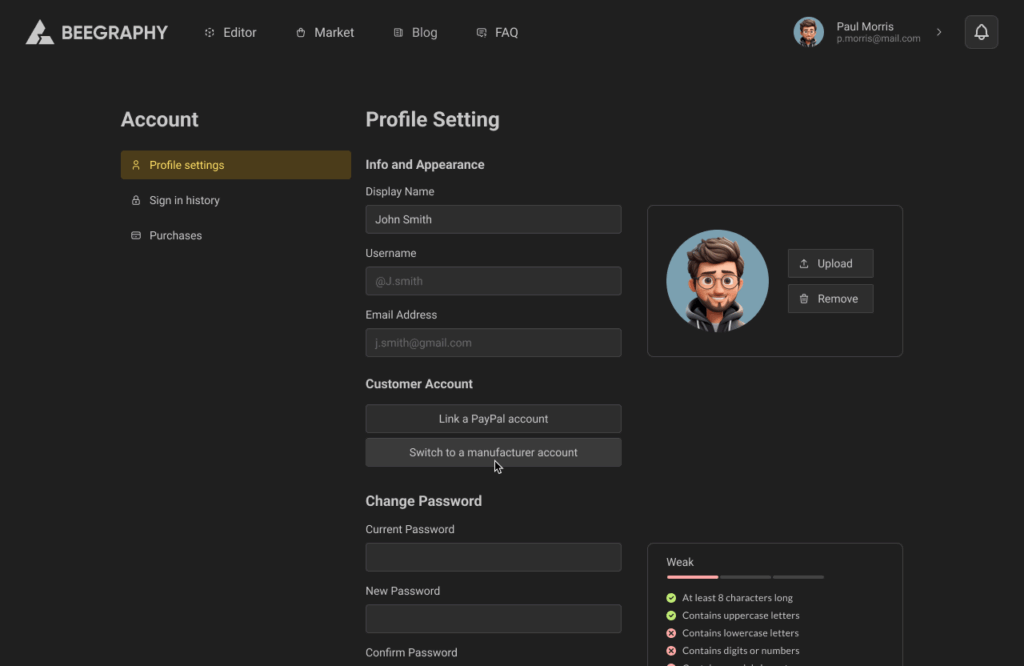
Choosing this instantly transforms your standard BeeGraphy profile into a manufacturer profile, unlocking advanced features like catalog management, pricing logic, storefront integrations, and quoting tools. This step is ideal for those who initially signed up as customers or designers but are now ready to build and sell configurable products.
Step 2: Fill in Your Business Details
After switching, you’ll land on the “Setup your business page” screen, as depicted in the second image. This form asks for essential details:
- Country of operation: Helps define currency, tax norms, and storefront rules.
- Business type: Choose between Individual or Company.
- Team size: Enables collaboration features and defines workspace access.
- Business segment(s): From furniture and jewelry to 3D printing or architecture.
- Sales & revenue metrics: You’ll estimate monthly sales, average ticket size, and total revenue. This data helps personalize your dashboard and recommend templates or features suited to your needs.
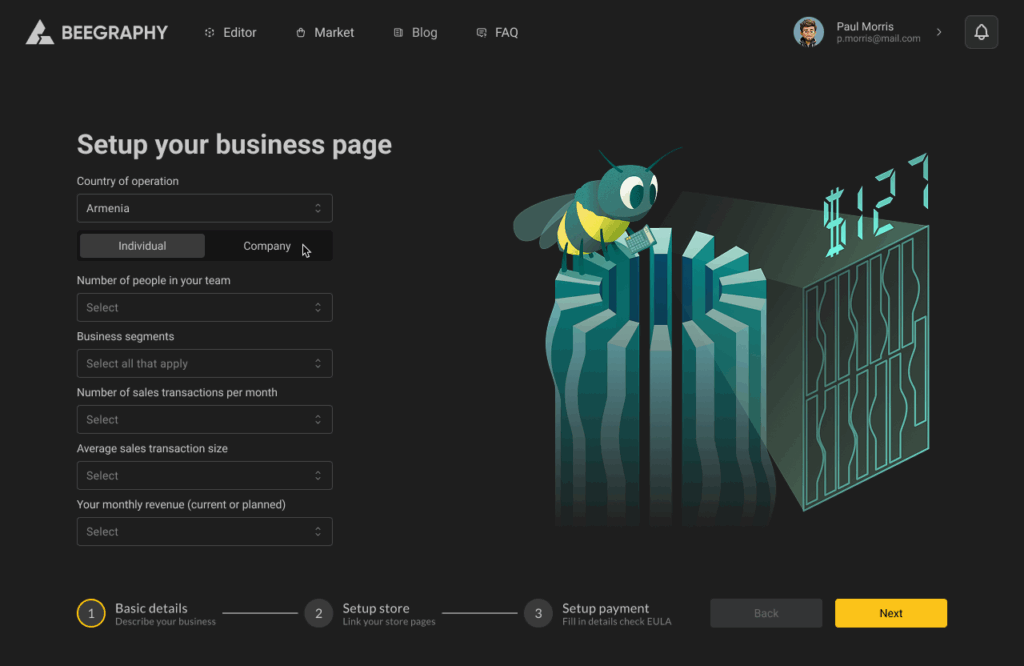
This onboarding screen is the heart of your BeeGraphy business setup. It’s visually designed for ease, supported by illustrations, and structured into three progressive steps (Business Details, Store Setup, and Payment Setup).
Once submitted, your Business Dashboard is ready for action, with storefront integration, inventory setup, and payment configuration just a click away.
Start Your Free Integration Trial
We understand that trying new software can feel like a commitment. That’s why BeeGraphy offers a 30-day free trial of the Integration Plan with no upfront payment. You can explore all premium features before making a decision.
There are two easy ways to activate your trial:
Option 1: From Storefront Integration
If you’re ready to link BeeGraphy with your e-commerce storefront, this is the most intuitive way to begin.
- Navigate to the Admin Panel
From the dashboard’s left panel, click on Admin Panel and select Storefronts. (Refer to the images given below) - Choose a Store Platform
You’ll see options like Shopify, WooCommerce, Squarespace, and Etsy. At the top, there’s a blue banner prompting you to “Try for free.” Click it to begin your Integration Plan trial. (Refer to Image 2.) - Complete the Flow
You’ll then be prompted to link your PayPal account and accept the terms of use. Once confirmed, your trial begins, and you can immediately start configuring and embedding products on your storefront.
Access the Admin Panel from the left sidebar of your BeeGraphy dashboard to start your 30-day free Integration Plan trial and connect with your preferred e-commerce platform.
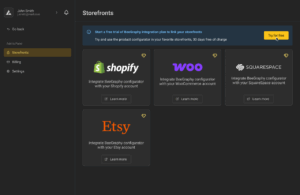
Choose your preferred e-commerce platform and start a 30-day free trial of BeeGraphy’s Integration Plan directly from the Storefronts section in the Admin Panel.
Option 2: From Dashboard Settings
If you prefer to set things up manually without linking a store right away, this method gives you flexibility.
- Go to Settings via the Admin Panel
Open the Settings tab from the Admin Panel. (Refer to Image 3.) - Click “Try BeeGraphy Integration Plan”
A yellow button appears with this label. Click it to begin the trial activation process. You’ll be guided through entering your business name and legal details. - Connect PayPal to Confirm
You will be asked to connect your PayPal account. There are no charges until the 30-day trial ends, and the exact billing date is clearly displayed.
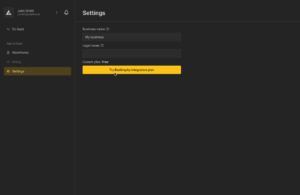
Activate your BeeGraphy Integration Plan trial from the Settings tab by clicking the yellow “Try BeeGraphy integration plan” button and entering your business details.
Once your trial is activated, you’ll unlock advanced tools for storefront publishing, live configuration, and quoting. It’s your chance to see how BeeGraphy can streamline your sales and production pipeline without any upfront commitment.
Getting Started on BeeGraphy: Simple Steps to Launch
We know managing customizable products can be complicated. That’s why we created BeeGraphy’s Business Dashboard to simplify everything from parametric design to order fulfillment. Think of it as your all-in-one assistant for managing products online.
Section 1: Catalog Management
Why is the catalog important?
Well, without models in your catalog, customers can’t customize anything. Let’s get your models ready to sell!
Adding Models:
- Community Library: Need quick designs? Browse our community library and license models from other designers. Just pay royalties when you make sales.
- Your Workspace: Created something great in BeeGraphy’s Editor? Perfect—publish directly to your catalog and keep complete control.
Use the “+ Add” button in your Catalogue to add models from the community, your workspace, a vault, or by entering a Model ID.
- Model ID: Working with external partners? Just enter the model ID to add their designs to your catalog effortlessly.
Use the “+ Add” button in your Catalogue to import models via Model ID — perfect for collaborating with external designers.
Handling Versions:
- You can easily experiment and update your models without affecting what’s live.
- Changed your mind? No worries, you can revert or archive old versions anytime.
Managing Orders Without the Headache
As soon as customers start placing orders, it’s important to have a system that doesn’t just store information but actively helps you move faster. Whether you’re handling one or fifty custom orders a day, BeeGraphy’s Business Dashboard gives you a clean and functional space to stay on top of it all.
- Organized Order Tabs
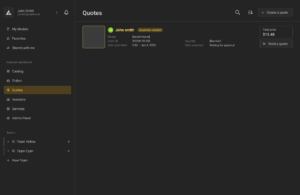
No more scrolling endlessly or guessing what’s next. Your orders are automatically sorted into tabs like Pending, Accepted, Completed, and Cancelled so you can act quickly based on priority.
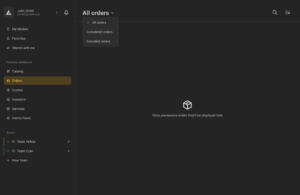
Keep track of every order with BeeGraphy’s organized order tabs — filter by All, Completed, or Canceled for a clear, actionable overview.
- Complete Order Details at a Glance
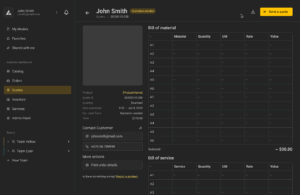
Open an order and instantly see what the customer wants. You’ll get a model preview, the full Bill of Materials, selected services, and even timestamps for every action.
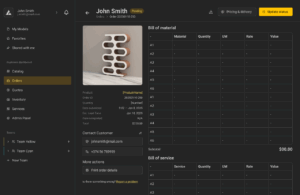
View every order detail in one place — model preview, Bill of Materials, selected services, and customer contact info, all neatly organized for quick action.
- Fast Status Updates with Auto-Notifications
With one click, you can accept an order, mark it as completed, decline it with a reason, or issue a refund. And yes, the customer gets notified instantly so you don’t have to send emails manually.
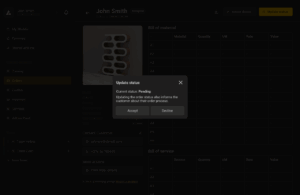
Instantly update order statuses on BeeGraphy with just one click, and customers are notified automatically, eliminating the need for manual follow-ups.
- Built-In Team Collaboration
Need to pass on a note to your production team or upload technical drawings? You can do that right inside the order. Add internal notes and documents so everyone involved stays aligned.
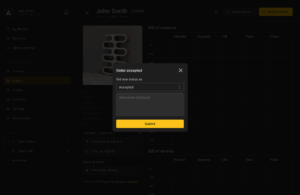
Collaborate seamlessly across teams by adding notes or instructions directly within the order and keep everyone in sync without switching tools.
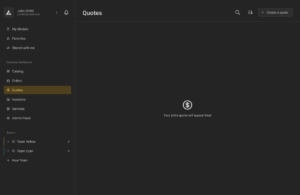
Quotation Management That Keeps You in Control
When customers ask for quotes or you need to prepare one in advance, the last thing you want is to wrestle with spreadsheets or copy-paste emails. With BeeGraphy’s quote tools, it’s all centralized, trackable, and designed to make pricing conversations smoother.
- Manual Quotes
Click “Create a Quote,” pick a model from your catalog, enter your customer’s details, and fill in any specific inputs or pricing adjustments. You can even include delivery estimates and terms before hitting send. The system generates a clean, downloadable PDF and sends it to the client instantly.
A centralized order management pop-up enables seamless status updates with optional internal notes, improving production team coordination.
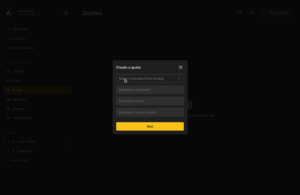
The intuitive quote creation window lets users select products and client details, enabling fast, professional quotations directly from the design platform.
- RFQ Responses
Sometimes customers will initiate the process through the configurator. When they do, it shows up right here in the dashboard. You can open the request, review their chosen options, and respond with a personalized quote — no need to rebuild anything from scratch.
Customer-initiated quote requests appear instantly in the dashboard, allowing you to review specifications and respond with a tailored quote—no rebuilding required.
- Quote Versioning
Did your customer ask for a change after the first quote? Or maybe you want to tweak pricing? Every update creates a new version, while the old ones stay saved for reference. This way, both you and the client stay on the same page, even as details evolve.
Each quote update creates a new version, ensuring a clear record of changes and full transparency between you and your customer.
Inventory Management
Your inventory is where the real magic of pricing, feasibility, and material logic begins. Everything your configurator displays, including materials and visual textures, depends entirely on what you configure in this section.
- Add Materials with Real-World Logic
You can start by adding production-ready materials like wood, resin, textile, or metal. Just define the unit price, select how it’s measured (area, volume, weight, etc.), and enter the stock quantity. If you want precision, you can even add a scrap percentage to account for material loss.
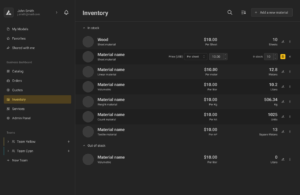
Manage production-ready materials with real-world precision and define units, set prices, and control stock to power your configurator logic.
- Create Your Own Materials
Click on “Add New Material” and you’ll see a clean form that lets you build a material from scratch. You can enter:
Display name
1. Internal name (for backend tracking)
2. Material class (like sheet or volumetric)
3. Part number
4. Manufacturer info
5. Tags for easier filtering
It’s flexible enough for large-scale operations but simple enough for solo designers.
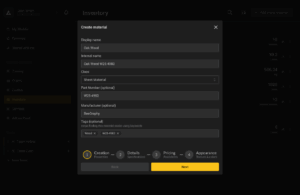
Easily add custom materials with detailed metadata: name, class, supplier, and tags, all in one streamlined creation flow.
- Add Physical Properties
To help the system calculate usage, you can enter thickness, length, width, and density. These inputs feed directly into pricing, filters, and manufacturing rules, so they’re not just for display.
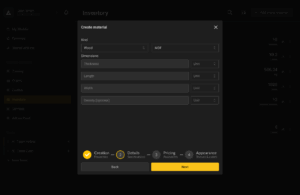
Define physical properties like thickness, length, and density, essential for accurate pricing, filtering, and manufacturing precision.
- Make It Look Good Too
You can also define how the material appears in the configurator. Upload a texture, choose a color, and tweak things like glossiness, roughness, or opacity. What your customers see will match what they actually get.
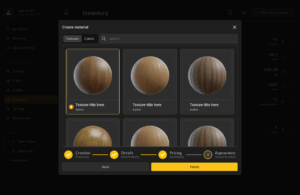
Define real-world material properties, from weight to texture, so your configurator displays accurate previews.
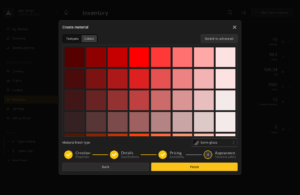
Make it visually perfect: Adjust glossiness, texture, and colour to match what customers will receive.
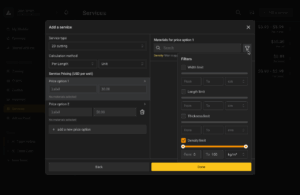
Services Management
Services are the production steps that bring your product to life , from laser cutting and engraving to polishing and packaging. You can manage all of them right from your dashboard.
- How to Add a Service
Click “Add a Service” and a panel will open. Here’s a quick walkthrough:
1. Service Type: This is the name shown to you and your customers (like “2D Cutting” or “Powder Coating”).
2. Service Group: Choose Material-based for raw processes like cutting or Product-based for finishing touches like packaging.
3. Calculation Method: Decide how to price it — per unit, meter, area, or weight.
4. Price Options: Add multiple pricing tiers with labels. Assign each one to specific materials.
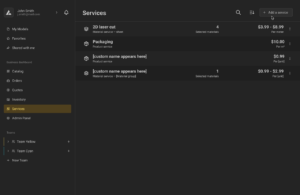
From laser cutting to packaging, set up and price your production services in minutes. Tiered pricing lets you charge fairly for every job.
Precision pricing: Limit services by material thickness, density, or size to ensure accurate quotes and feasible orders.
- Filter by Material Attributes
Click the filter icon to limit the service by:
1. Width, Length, or Thickness
2. Density range
For instance, if a cutting service only works on sheets under 10mm, just set the thickness limit.
Once you’ve set it up, click Done and your service is ready to use.
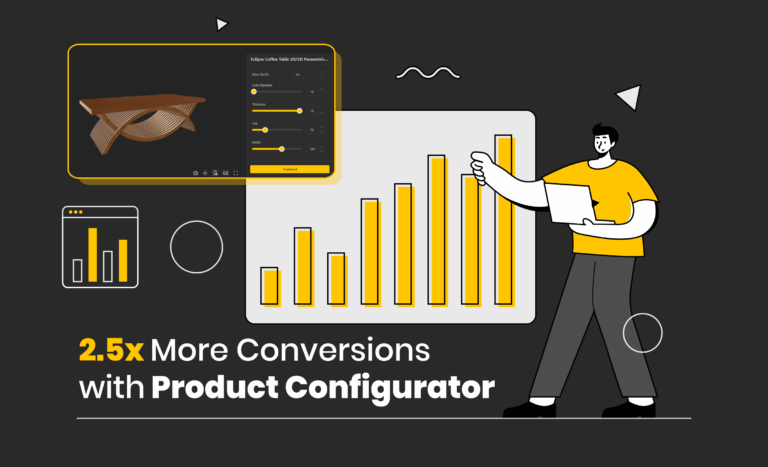
Why Businesses Are Switching to 3D Product Configurators
Let’s be real. Online selling has changed. Customers don’t just want to buy; they want to build. Whether it’s a custom ring, a modular bookshelf, or a made-to-order lamp, they want control, clarity, and confidence before they hit “Add to Cart.”
That’s where 3D product configurators come in. They’re no longer a nice-to-have. They’re quickly becoming the expectation.
According to Epsilon, 80% of consumers are more likely to make a purchase when brands offer personalized experiences. Shopify and Etsy have both reported increasing demand for listings that support real-time customization and product previews.
Still relying on static images and long email chains for quotes? That’s hurting your conversions.
- Customers want to see how changes affect their design in real time.
- They expect instant pricing updates based on the options they choose.
- They don’t want surprises at checkout or vague product specs.
3D configurators make your products feel real, personal, and ready to go. They remove the guesswork and let your customers explore confidently.
More and more businesses, from small furniture studios to experimental jewelry brands, are using configurators to win more orders, reduce back-and-forth, and streamline custom production.
And here’s the best part. If you’re already designing with parametric tools, you’re halfway there. You just need a system that turns your models into a live, customer-friendly experience. That’s exactly what BeeGraphy is built for.
Curious to see it in action? You can start a free trial or explore the dashboard to see what a configurator can unlock for your business.
Take the Next Step
Ready to revolutionize how your business handles customizable products? BeeGraphy’s Business Dashboard is your essential tool to simplify complexities and unlock business potential.
- Create Your Business Account Today
- Activate Your 30-Day Free Trial
- Discover More through Our Documentation and Support Resources
Join the growing community of innovative creators who are transforming complexity into effortless, scalable business success with BeeGraphy.