Contents
I always wondered how to turn design iterations into a pipeline instead of a redo. This is the story of how design automation answered that question for me, through one vase, one workflow and more variations than I could have modelled by hand.
Every design task I start bombards me with possibilities. There are the ones I want to see, the ones I want to understand, and most of them I want to compare side by side. I think every designer’s mind juggles ideas this way. The ideas were never the problem. The problem was the time it took to build each one by hand, only to start over for the next.
Then, while working in BeeGraphy https://beegraphy.com/workspace, I realized design automation was already at my disposal. I had a new task on my desk, a vase, and I wanted to automate its workflow. The idea just fit.
One idea. A few parameters. Some rules. Endless possibilities, without starting from scratch again.
What Design Automation Means to Me
Before building anything, I gave some thought to what design automation actually is, and which tasks are worth handing over to it.
The simplest way I can put it: I already set rules, parameters and constraints every time I design. I just keep most of them in my head. Design automation is what happens when I write those rules down inside one workflow, so the computer can repeat the steps while I keep making the decisions.
It is less about speed than about freedom. When the repetitive part runs on its own, I get to spend my time exploring rather than rebuilding. It is writing the recipe once instead of cooking every dish by hand.
That shift sounds small, but it changes the questions I ask. Instead of “how long will this take to redo?”, I started asking “what else could this become?” That second question is where most of my favorite results came from.
Which Design Tasks Can Actually Be Automated?
When I listed the tasks that design automation handles well, I ended up with four. The vase touched every one of them.
1. Generating repetitive geometry, such as ribs, panels and patterns. The surface pattern on the vase wall is made of many small, similar cells. Placing them one by one would eat up hours. As a rule, it takes a slider.
2. Producing varied design iterations. Every time I move a value, I get a new vase. Iteration stops being a chore and becomes the default.
3. Configuring systems or products. Once the rules are set, the vase is no longer a single object. It is a product with options that anyone can configure.
4. Updating a design whenever its parameters change. If I make the vase taller, the twist and the pattern follow along. Nothing needs to be fixed by hand.
My Design Automation Workflow, Step by Step
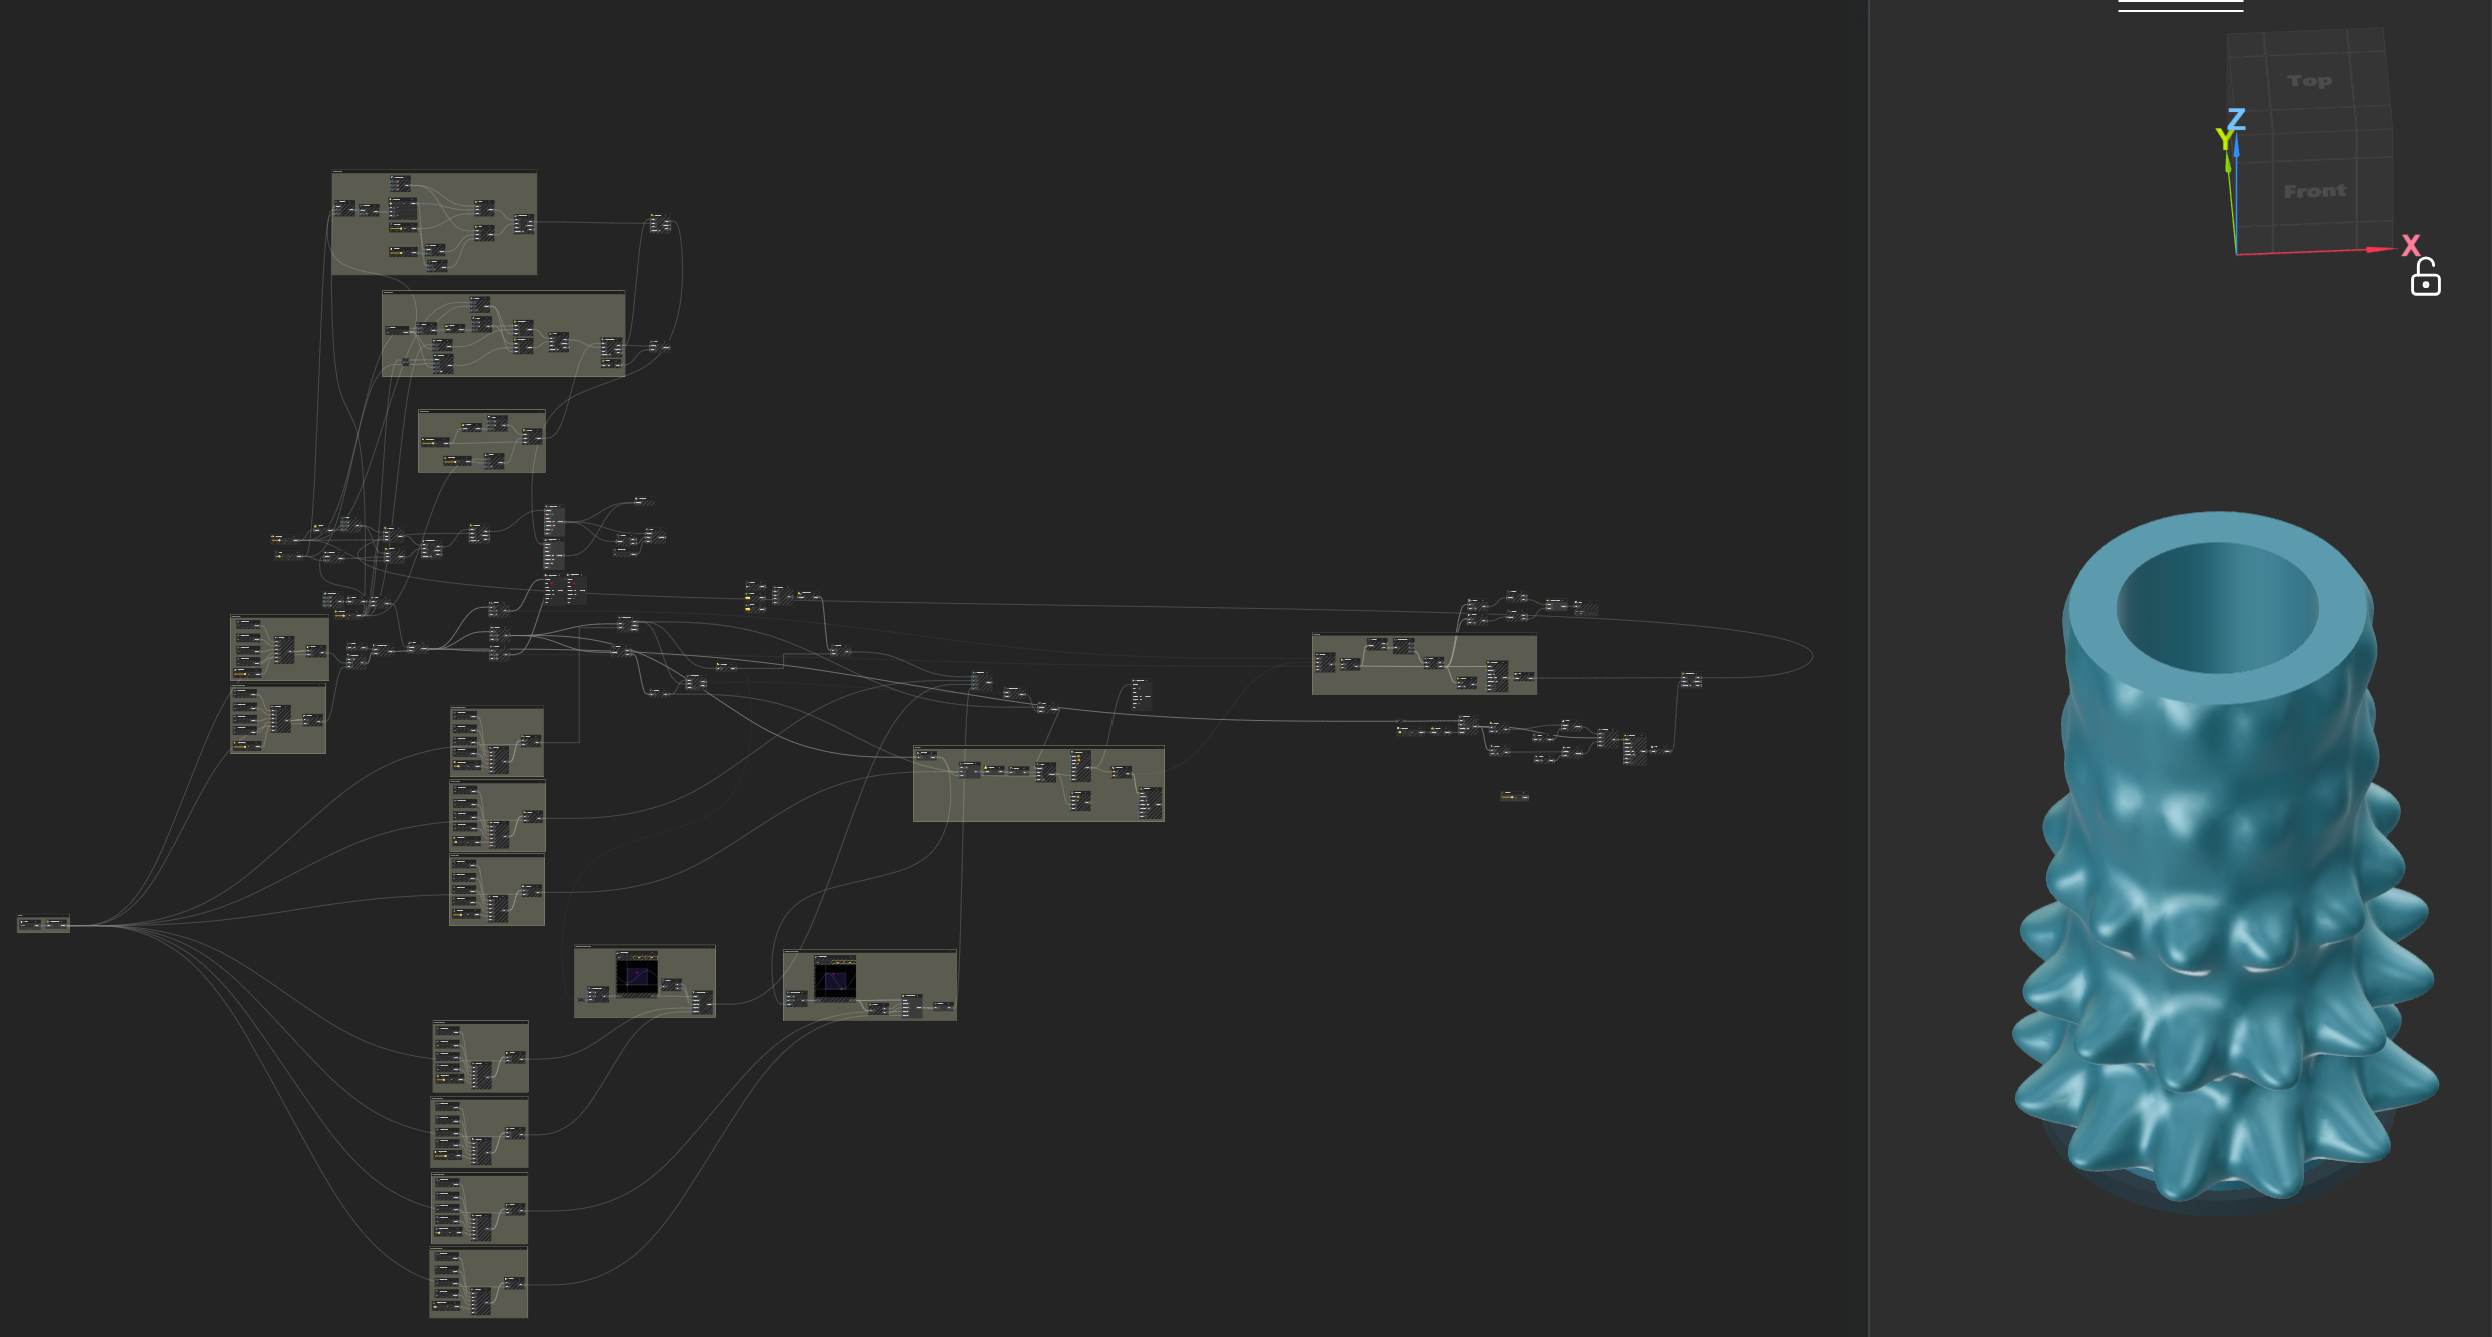
I split the vase into three sets of rules and kept each one in its own group in the BeeGraphy node editor: Profile, Twist and Pattern. Keeping them separate made it easy to test one idea at a time.
Step 1: The Profile
I started with the silhouette. It is controlled by a handful of values: the height, plus the radius at the base, the belly and the neck. Together they shape the curve that the whole vase is built on.
In my old workflow, a taller or rounder vase meant redrawing the curve. Now I change a number and the curve re-forms. Squat and heavy, tall and slender, and everything in between all come from the same four values.
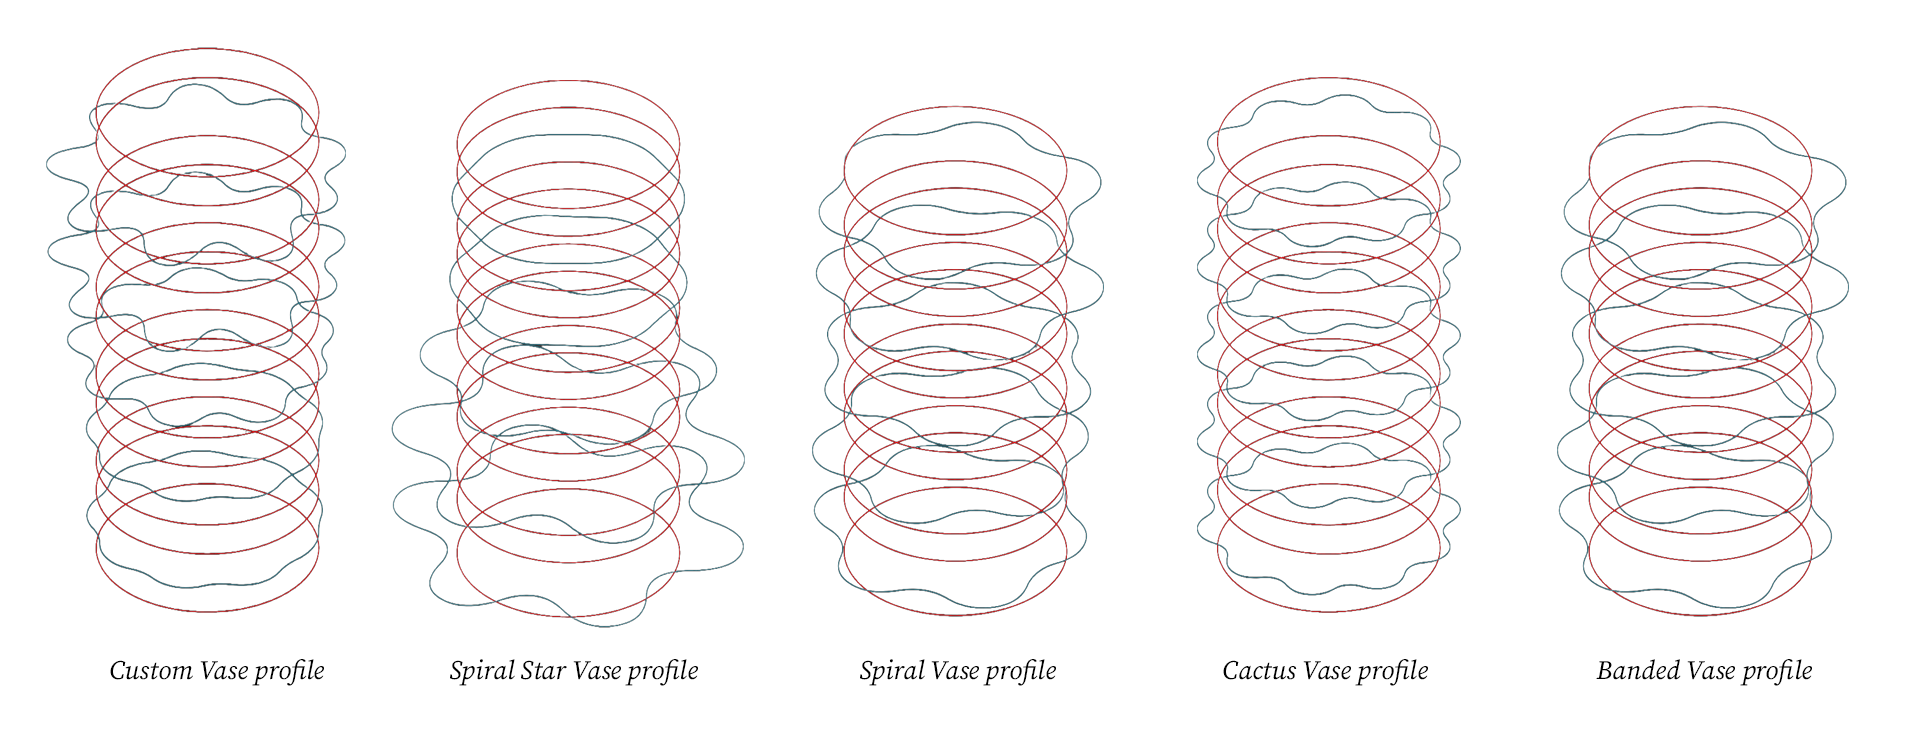
Step 2: The Twist
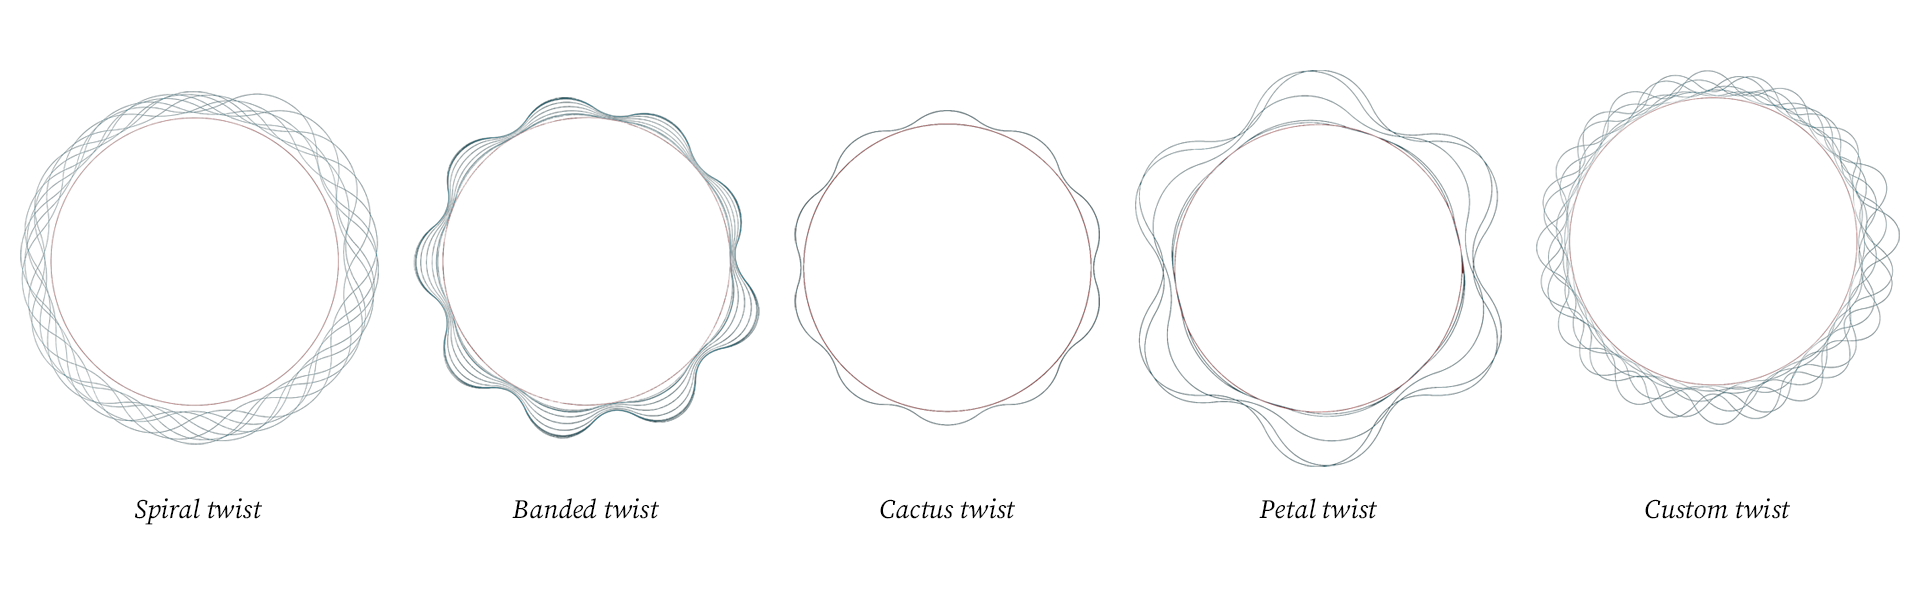
Next came a rotation from the base to the rim. Each section of the vase turns a little more than the one below it.
At zero, the vase stands calm and upright. Turn the value up and the same shape starts to spiral. This was the parameter that changed the character of the vase the most, and it is also the one I enjoy moving the most.
Step 3: The Surface Pattern
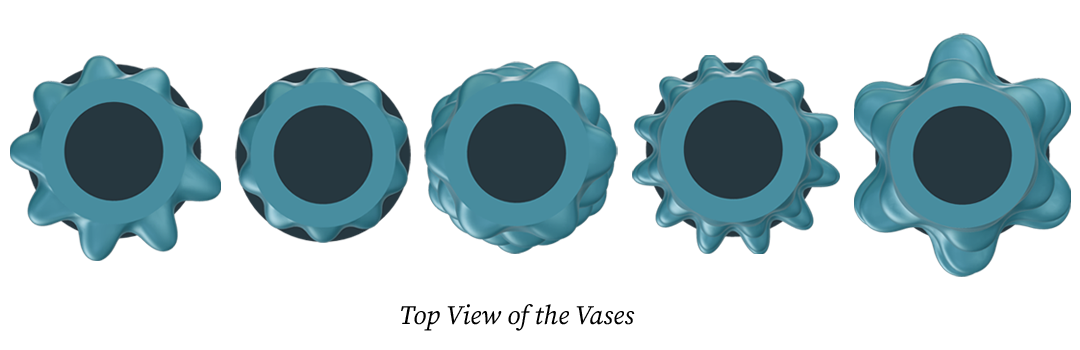
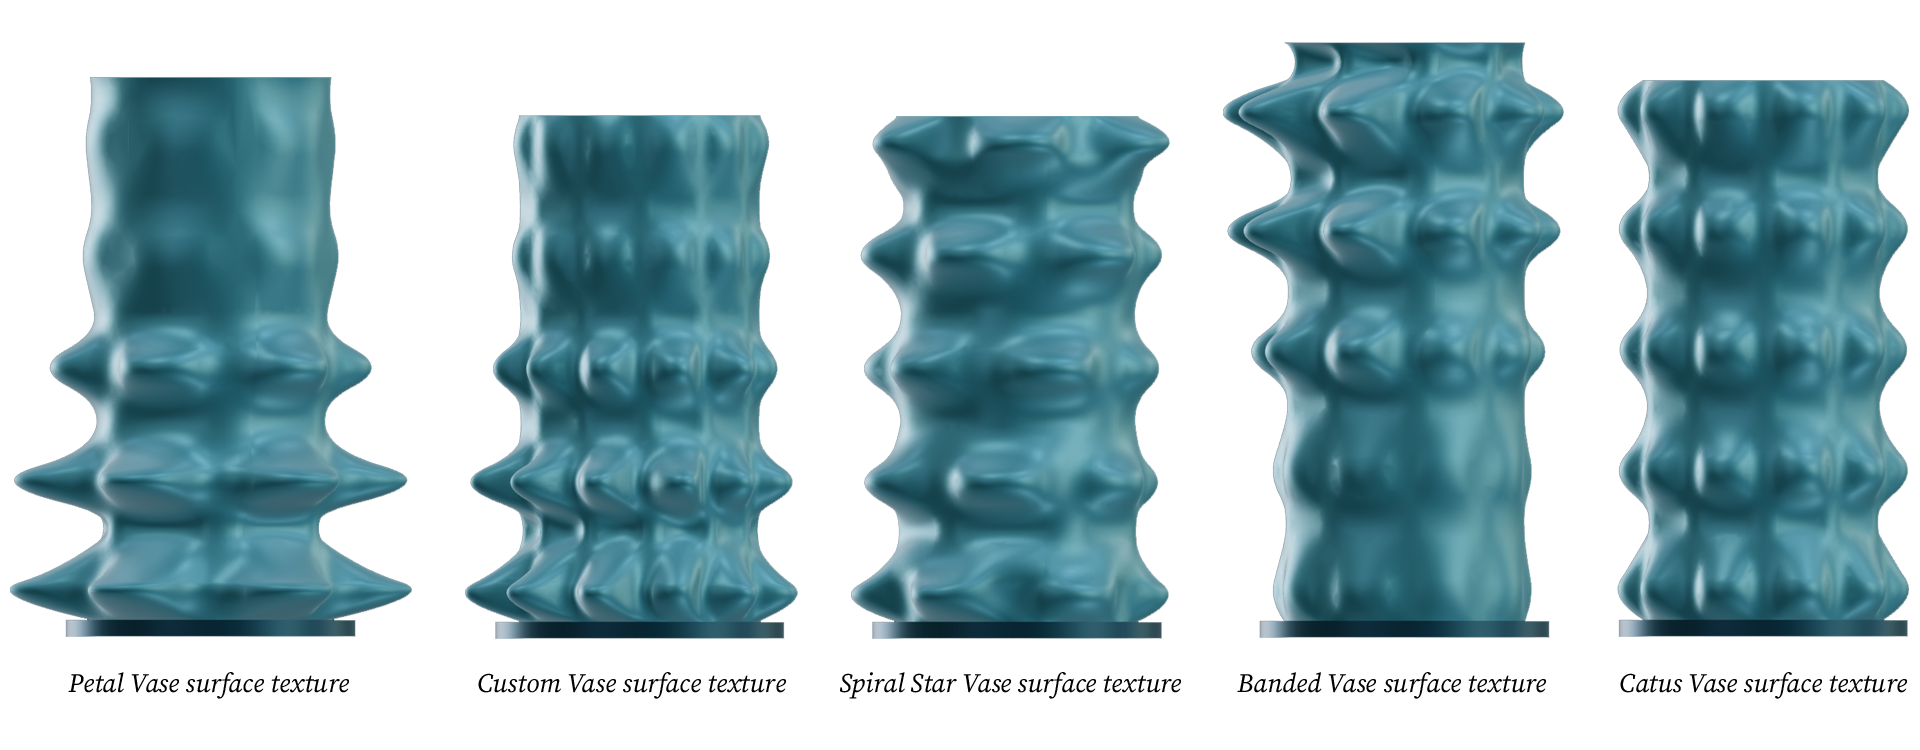
Last came the wall. I mapped a pattern across the surface and put its density on a slider. At one end the vase is solid. In the middle it becomes textured. At the other end it turns almost lace-like.
This is where one form started turning into different objects. The profile and the twist stayed the same, but the vase read completely differently depending on the pattern.
Manual Workflow vs Design Automation
Looking at the two ways of working side by side made the difference clear to me.
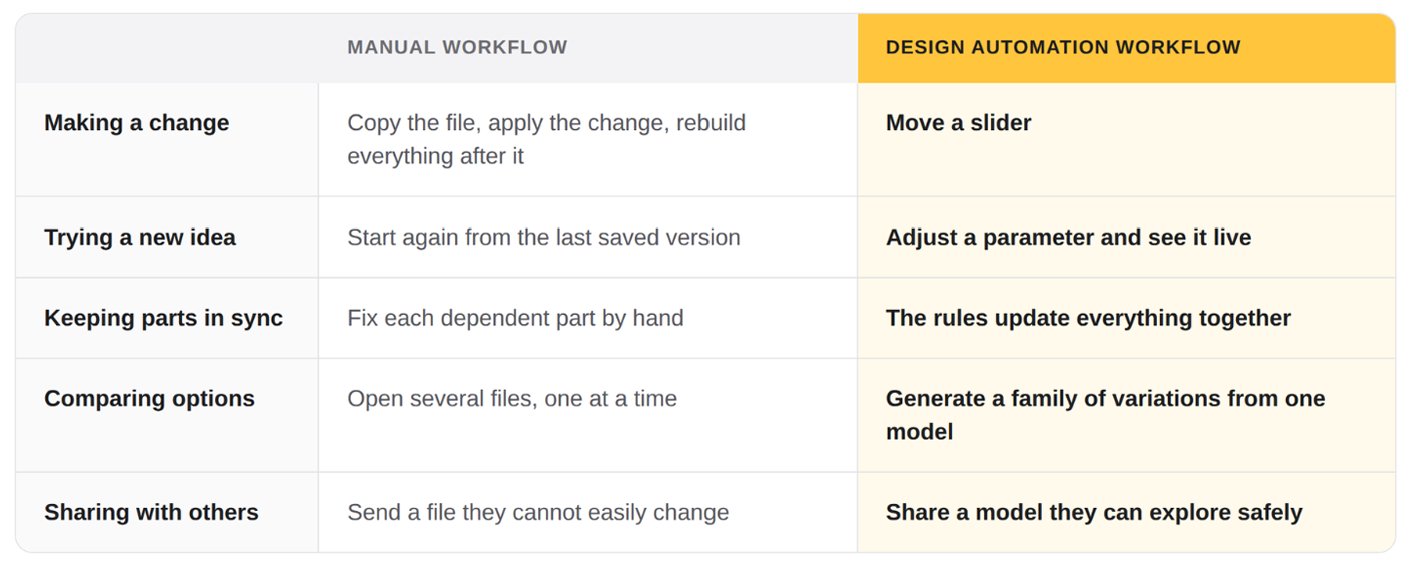
In the manual loop, every “what if” sent me back through the same steps. With design automation, the rules stay put and only the numbers move.
5 Signs It Was Time for Design Automation
Looking back, the vase showed every sign I now watch for. If you recognize these in your own work, it is probably time to automate.
1. I Kept Repeating the Same Steps
Once is a task, twice is a coincidence, three times is a pattern. By the third copy of the same vase file, I was clearly doing work that a rule could do.
2. One Change Affected Everything
A taller vase meant re-fitting the twist and redistributing the pattern. When one small edit ripples through many parts, design automation lets the rules do the fixing.
3. I Wanted to Compare, Not Just Make One
I did not know which vase I liked until I could see several of them together. Variations are cheap when they come from parameters rather than copies.
4. I Wanted Others to Try It
I wanted other people to make their own version of the vase without touching my geometry. A parametric model lets them explore safely inside the limits I set.
5. I Could Put the Logic in One Sentence
“The pattern gets denser toward the rim” is a sentence, so it can be a rule. If I can describe the logic in plain words, I can usually build it.
When I Avoid Design Automation
Design automation is not my answer to everything. There are times I deliberately hold off.
When the idea is still fuzzy. I sketch first. Automating an unclear idea only gives me unclear variations, faster. The vase worked because I already knew the three things I wanted to control.
When it is a one-off. If I need one vase, I model one vase. When setting up the rules takes longer than doing the work by hand, the setup is not worth it.
When the decision is about taste. The workflow can give me fifty vases. Choosing the one worth making is still my job, and I would not want it any other way.
My rule of thumb is simple: automate when setting up costs less than repeating, and when I understand the problem well enough to write its rules down.
From My Workflow to Something Others Can Use
In BeeGraphy, the 3D preview updated as I moved each slider, so trying a variation never meant remodeling. That instant feedback is what made the workflow feel responsive rather than repetitive.
Once I had a family of vases I liked, I published the model as an [interactive configurator] BeeGraphy configurator page, so anyone can move the same sliders and make a vase of their own. I exported my favorite picks as STL for printing, also options like OBJ and DXF are too present within the editor workspace, if a project needs them.
Who Gets the Most Out of Design Automation
If you are a student, a project like this vase teaches you to think in systems. You stop drawing one form and start defining the rules for a whole family of forms, and you begin to see how one parameter shapes everything else.
If you teach, a model like this becomes a live classroom demo. Students clone it in one click, move a slider and see cause and effect straight away. Abstract ideas about logic and geometry become something they can see.
If you are a computational designer, the payoff is building something other people can use. A well-structured definition is a tool, not just a file.
The Takeaway
Every task still bombards me with possibilities at the start. What has changed is that I no longer have to pick one and hope. With design automation, I can see them all and spend my time on the choosing.
I did not set out to change how I work. I set out to make one vase. But once the rules were in place, going back to copying files felt like a step backwards. That is what responsive means to me: a design that answers back the moment I ask it a new question.
The next time you catch yourself copying an iteration for the third time, that is your cue to move from repetition to responsive.
Want to make yours? beegraphy.com, explore and watch one idea become many.