By selecting the Publish(6) command, users can make their completed models available to others. There are several publishing options, which we will explore sequentially.
Upon clicking the Publish button, the following window appears:
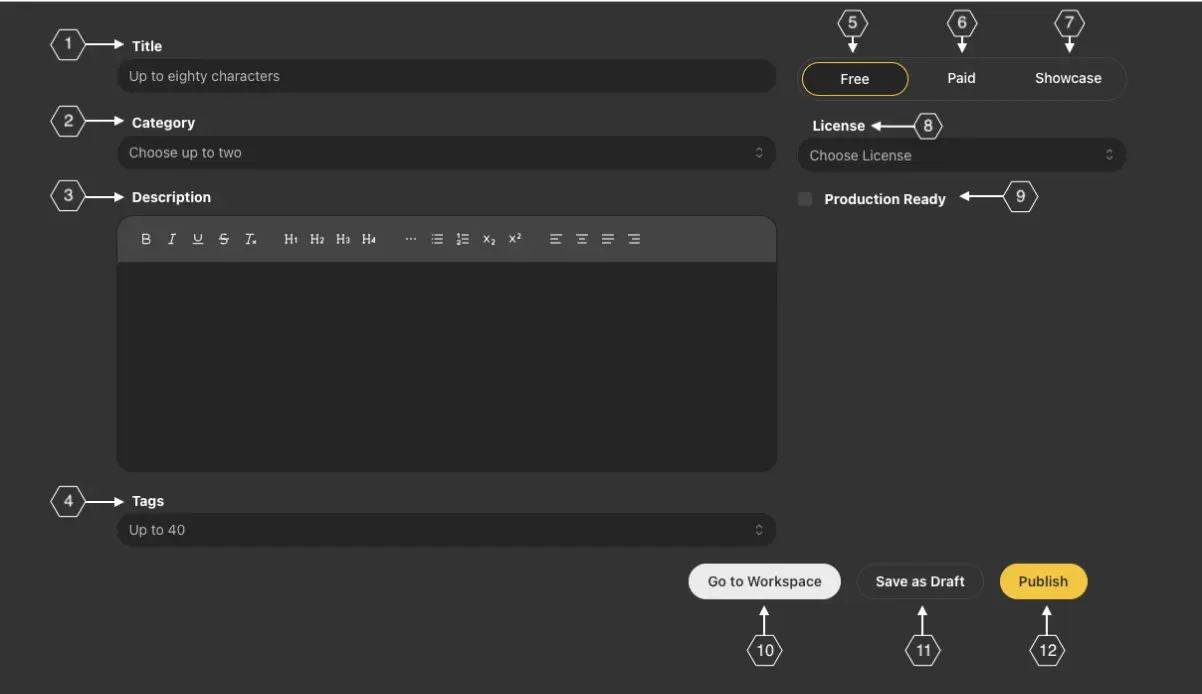
The first step is to enter the model name (1), which will be used to identify it in the Market section; it should clearly describe the model.
Next, select the category(2) to which the model belongs; you can choose one or two categories.
Provide a description of the model in the Description(3) field.
In the Tags(4) field, you can select from suggested tags or add new ones.
In the next section, it’s advisable to choose from several publishing options:
Free(5) means the model will be freely accessible to other users in the Market section.
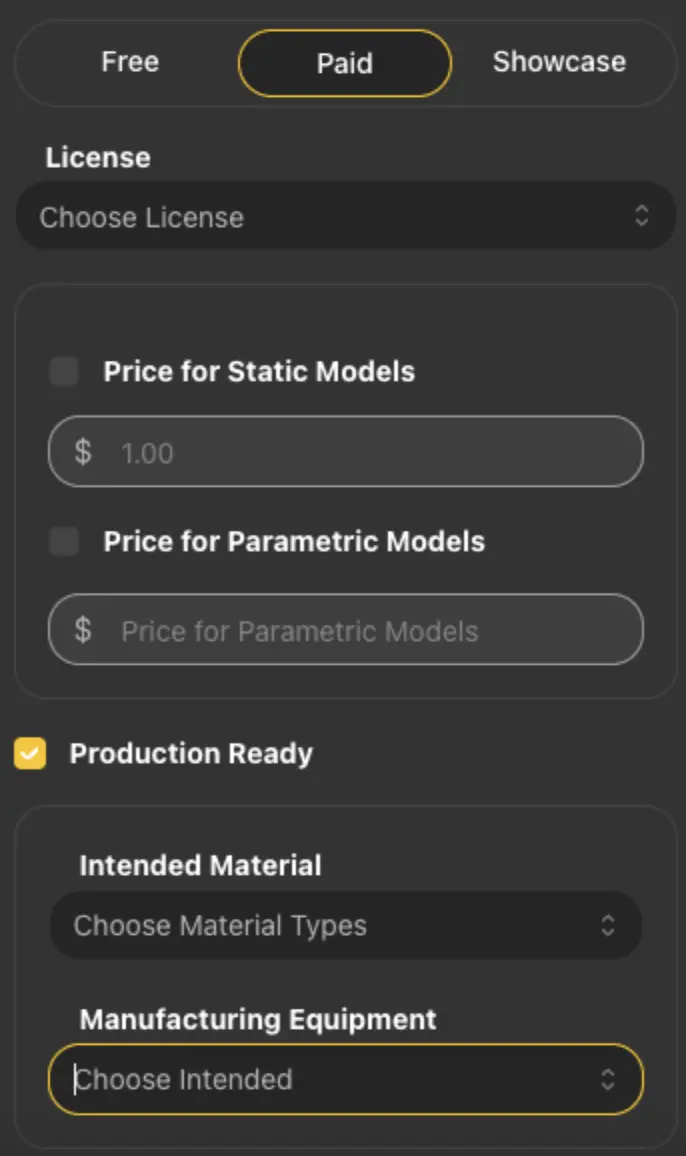
The Paid(6) option entails uploading the model to the Market section with a user-defined price for static and parametric models. It’s important to note that in this case, a registered account with the PayPal payment system is required.
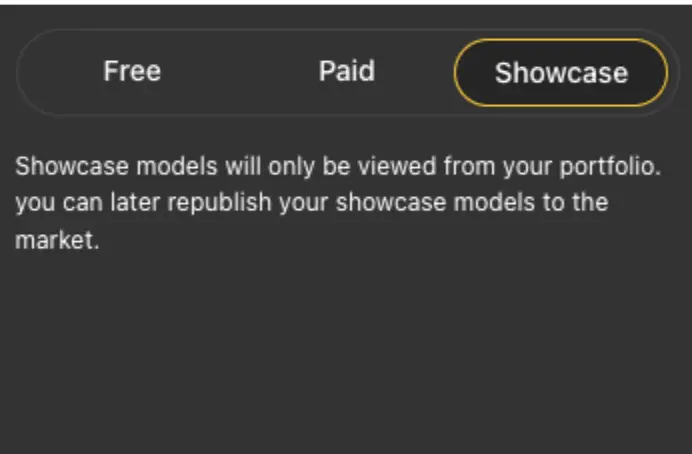
If the Showcase(7) option is selected, the model will be accessible in the user’s personal Portfolio section.
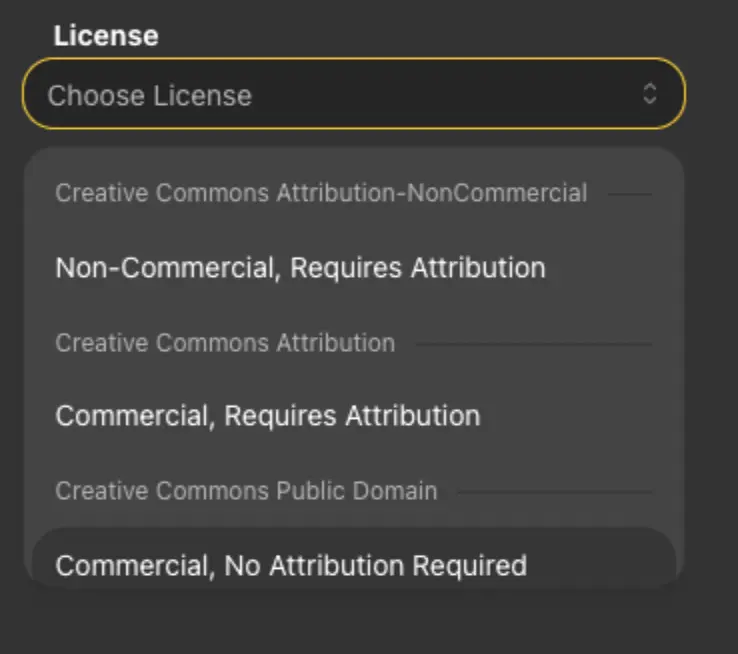
After choosing the publication option of the model, it is necessary to select the type of license (8) from the options offered for the model.
Activating the ’Production Ready’ (9) button implies that the created model is ready for production, indicating that it contains the corresponding production file that can be downloaded and used.
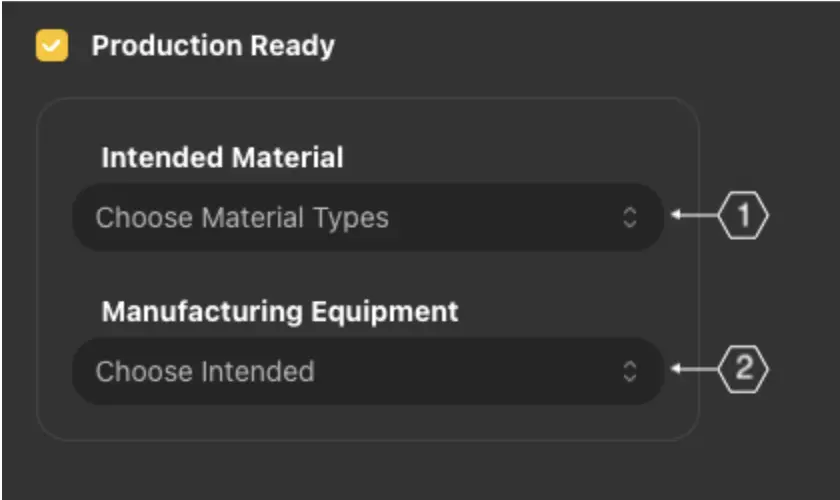
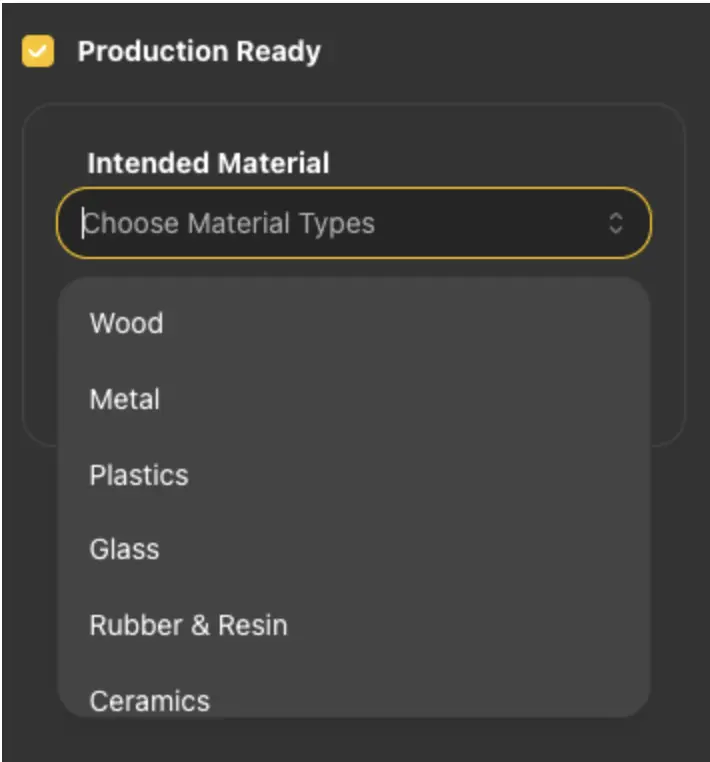
If the model contains a ready-made production file, you should select the materials (1) from the given list in the opened lines.
In the next line, you need to select the necessary equipment for producing the model from the offered list.

Having completed the above actions, we can proceed to the next part. If you need to return from the publishing stage to the Workspace without losing the work done, press the ’Go to Workspace’ (10) button.
To save the work and make additions later, you can save it as a draft using the ’Save as Draft’ (11) button. After filling and checking all the necessary fields, you can publish the model by pressing the ’Publish’ (12) button.