Within the Teams (13) section, you’ll find information on teams created by the user and those to which the user has been invited.
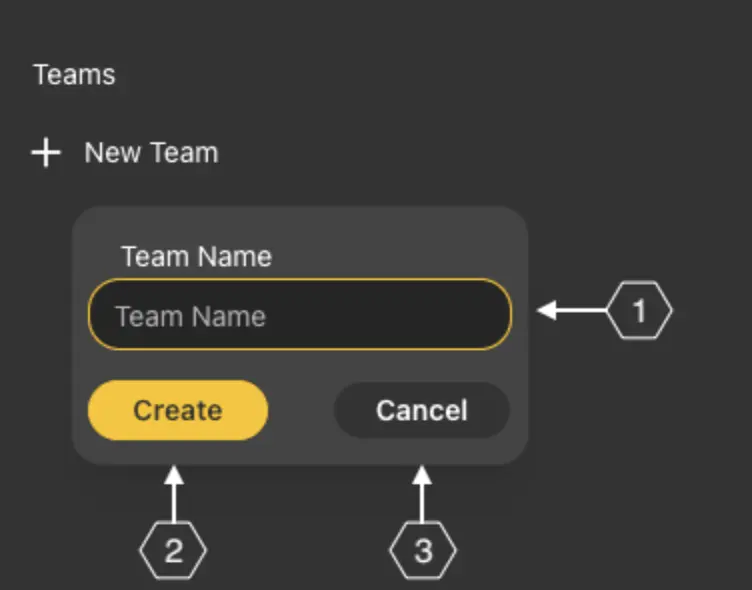
To create a new team, simply click on ’New Team’ and provide a name for the team in the window that appears (1). Confirm your choice by clicking ’Create’ (2), or opt out by selecting ’Cancel’ (3).
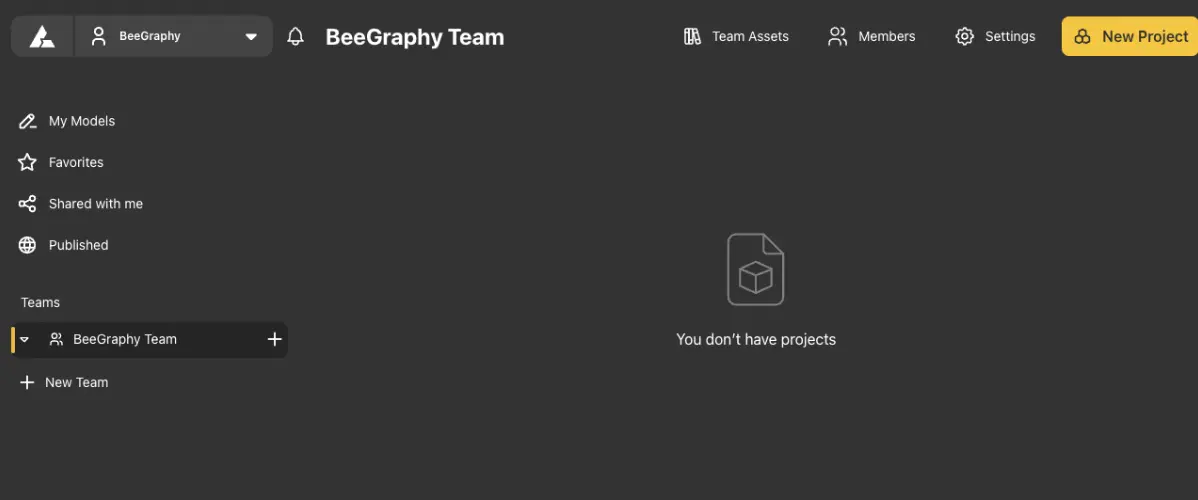
The created team will appear in the Teams section.
Now, let’s explore the capabilities of the team, beginning with the team settings section.
Clicking on the Team Settings button will open a window where you can modify the team settings.
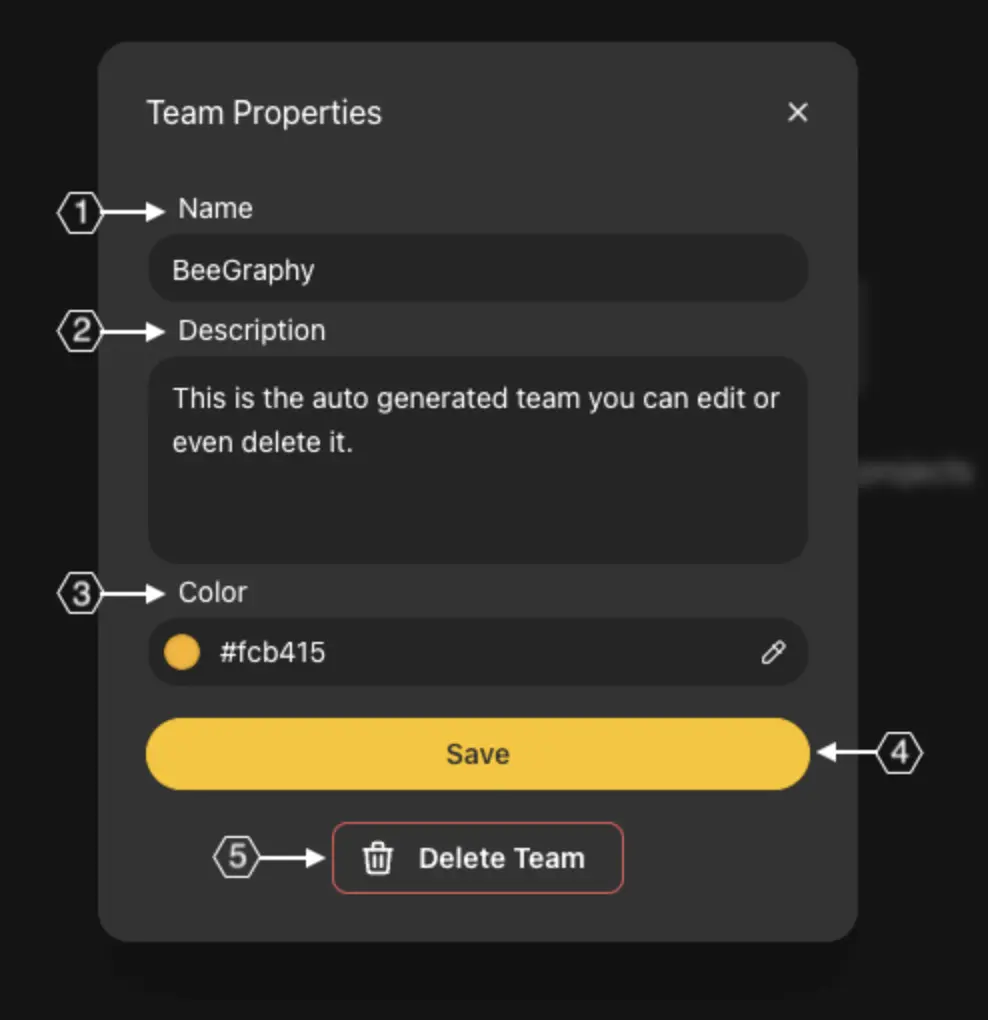
In the opened window, you can modify the team name (1), add a team description (2) to elaborate on its content, and adjust the team’s color (3) for easier identification.
To save the changes, click the Save button (4).
The Delete Team button (5) permanently removes the team and its contents. Upon clicking this button, you’ll be prompted to confirm by entering the team’s name before proceeding with the deletion.
Next, we have the Members section, designed for team members.
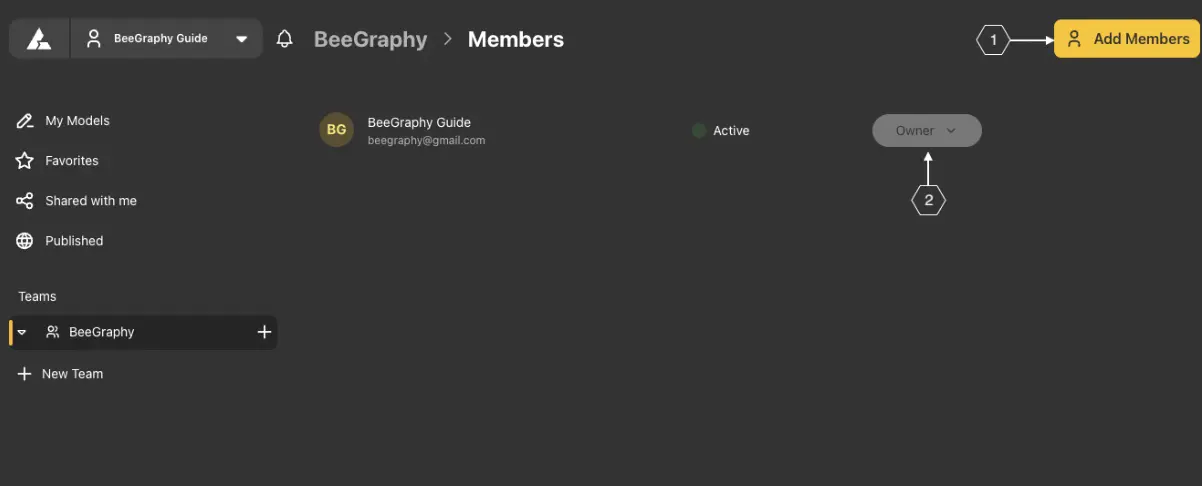
Opening this section, we’ll see the team members listed. Initially, only the information of the user creating the team and their role within the team will be displayed here. To invite new team members, click the Add Members(1) button.
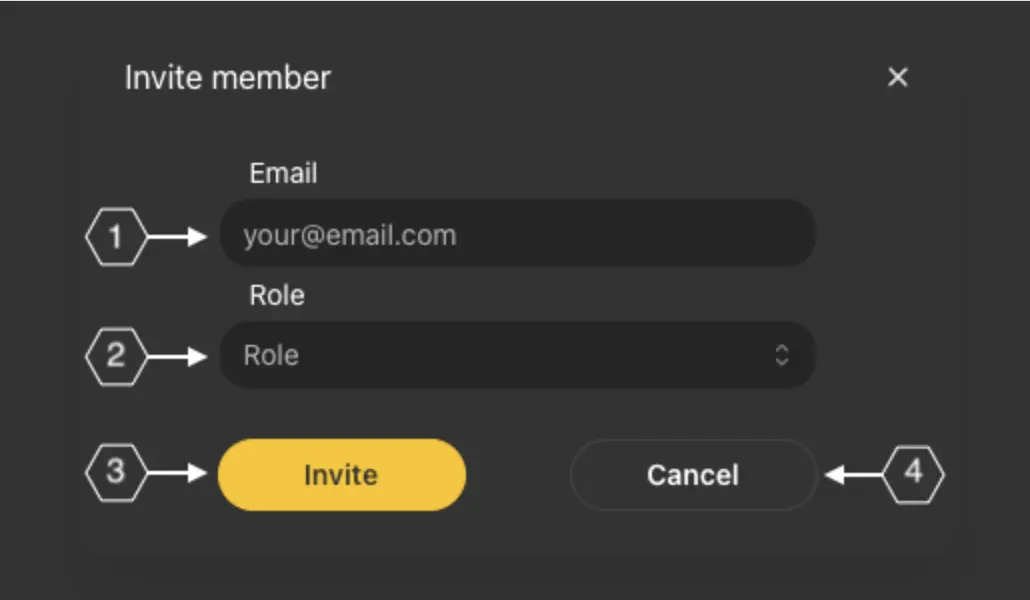
In the window that appears, provide the email address (1) of the user you wish to invite. This should be the same email they used to register on the BeeGraphy.com platform.
To select the role of the invitee within the group, click on the ’Role’ field (2) and select the appropriate role from the options provided.
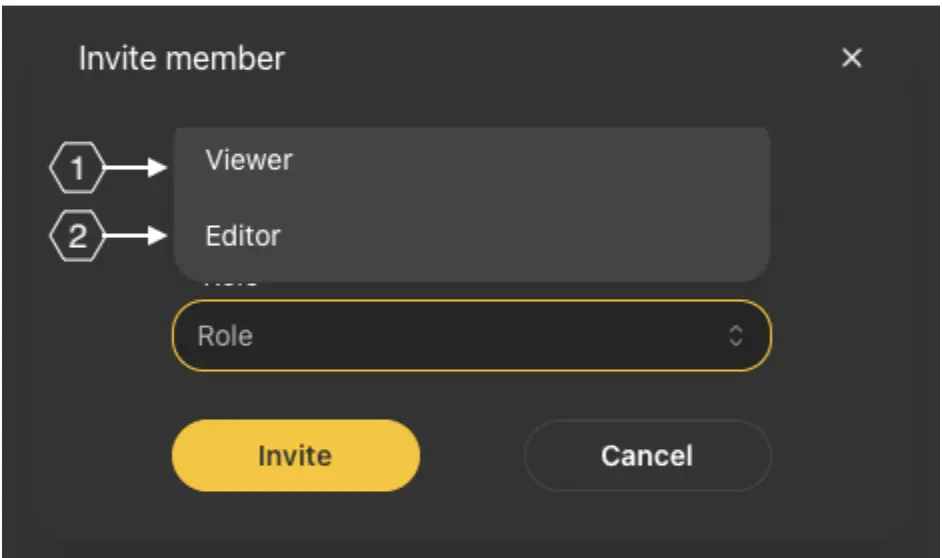
If the ’Viewer’ (1) role is specified, the invitee will have limited access to the team. They will be able to view the models, make changes to dimensions, but won’t be able to alter nodes.
Assigning the ’Editor’ (2) role grants the invited contributor full access to projects and models within the team.
Once the relevant fields are filled, click ’Invite’ to send the invitation, or ’Cancel’ to discard the changes.
After confirmation, the new user will be added to the list of team members.
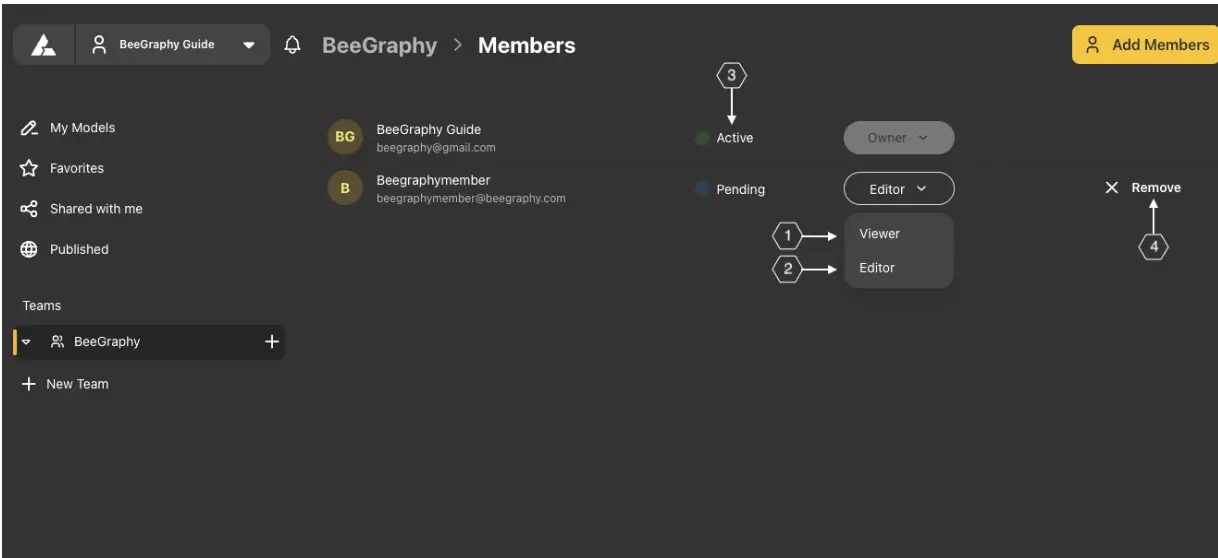
To modify the role of a team member, click on their current role and select either Viewer(1) or Editor(2) from the options in the pop-up window.
The user’s activity status is displayed in the (3) column, with ’Active’ indicating an active user and ’Pending’ indicating a pending connection request.
To remove users from the team, simply click the Remove(4) button next to their name and confirm the removal.